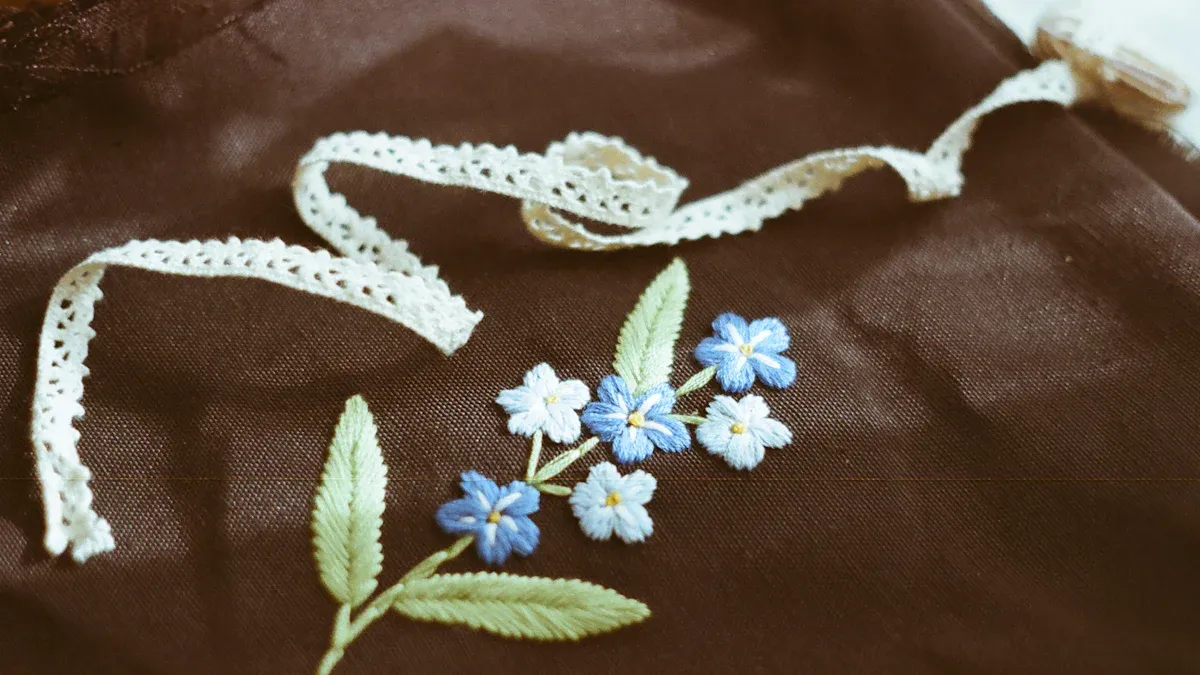
If you want to put beads on Embroidered Fabric, it is easier than you think. The right steps help you add beads for shine and texture. Bead embroidery is getting more popular everywhere.
Many people say anyone can use bead embroidery with clear steps. You can make any project look special with beads!
- Beginners do well if they have good instructions.
- People with experience also like easy bead projects.
- Help and clear steps let everyone try new techniques.
Key Takeaways
- Pick the right needles and strong threads like polyester or waxed thread. This makes sewing beads easier and helps them last longer.
- Try different bead embroidery stitches like single bead stitch, backstitch, running stitch, and couching. These stitches help you make cool designs and keep beads in place.
- Choose strong, tightly woven fabrics like cotton or linen. Use stabilizers for stretchy fabrics to hold beads and stitches steady.
- Plan where your beads will go before you start. Mark your fabric and use tools like tweezers and hoops for neat work.
- Make your bead embroidery last by keeping thread tension even. Wax your thread and clean your tools often.
Tools and Materials
Before you start adding beads and sequins to your embroidered fabric, you need the right tools and materials. The right choices make your fabric beading projects easier and help your embroidery last longer.
Needles and Threads
You want a beading needle that fits through the tiny holes in beads and sequins. Here are some tips for picking the best beading needle:
- DMC size 10-12 beading needles work well for most bead embroidery.
- Beading needles are long, thin, and flexible. They have small eyes so you can pass them through beads and sequins many times.
- Brands like Tulip and John James make strong, flexible beading needles.
- If you use very small beads or sequins, try a size 15 beading needle.
For thread, polyester sewing thread is a great choice. It is strong and does not break easily. Waxed thread is also helpful because it slides through beads and sequins smoothly and does not fray. Both options help your bead and sequin stitches stay strong.
Tip: Wax your thread before you start. This makes it easier to pull through beads and sequins and keeps your stitches neat.
Bead Selection
Choosing the right beads and sequins makes your embroidery stand out. Think about these points:
- Beads and sequins come in many sizes, shapes, and colors. Pick ones that match your design.
- Make sure your thread and beading needle fit through the bead holes.
- Uniform beads and sequins, like Japanese Miyuki Delica beads, help your stitches look even.
- Use beads and sequins with a finish that matches your embroidered fabric for a polished look.
A table can help you compare bead and sequin choices:
| Type | Best For | Notes |
|---|---|---|
| Seed Beads | Fine details | Uniform size, many colors |
| Bugle Beads | Lines and borders | Long, tube shape |
| Sequins | Sparkle and shine | Flat or cupped, many finishes |
Fabric Preparation
The base fabric matters a lot in bead embroidery. Cotton and linen are top picks because they are strong and have a tight weave. These fabrics hold beads and sequins well and keep your stitches from pulling out. Suerte Textile’s custom embroidered fabric is also a great choice. It is made for embroidery and supports beads and sequins beautifully.
If you want to use stretchy fabric, you need a stabilizer. Stabilizers keep the fabric from stretching or puckering when you add beads and sequins. Cut-away stabilizers work best for knits and spandex. You can also use adhesive sprays or magnetic hoops to keep your fabric tight and smooth.
Note: Always pre-wash cotton and linen before you start. This stops shrinking and keeps your embroidered fabric looking great.
How to Embroider with Beads

Learning how to embroider with beads can turn any embroidery project into something special. You can use different stitches to sew beads onto fabric and create amazing designs. This step-by-step guide will show you four popular techniques. Each one lets you add beads in a unique way. You can mix these methods to get the look you want.
Single Bead Stitch
The single bead stitch is the easiest way to sew single beads onto fabric. You use this stitch when you want to place beads one at a time for detail or to fill small spaces.
How to do it:
- Thread your beading needle with strong thread.
- Bring the needle up from the back of the fabric where you want your bead.
- Pick up one bead with the needle.
- Pull the bead down to the fabric.
- Push the needle back down right next to where you came up.
- Repeat for each bead.
Tip: Draw small dots on your fabric as a guide. This helps you keep your beads in a straight line or pattern.
You can use this stitch to add beads to flower centers, create dotted lines, or fill in shapes. If you want to sew single beads in a cluster, just repeat the steps close together.
Backstitch Beading
Backstitch beading is great for making strong lines of beads. This technique uses the backstitch, which is one of the most secure embroidery stitches. Many people use it for outlines or borders in beadwork.
How to do it:
- Draw a line on your fabric where you want the beads.
- Bring your needle up at the start of the line.
- Pick up two or three beads.
- Lay the beads flat along the line.
- Push the needle down at the end of the last bead.
- Bring the needle up between the last two beads.
- Pass the needle through the last bead again to secure beads.
- Repeat, adding more beads along the line.
The backstitch is known for its strength and security. When you use it to sew beads onto fabric, your beadwork will last longer and resist coming loose. Many experts recommend starting and ending your rows with small repeated stitches. This stops the thread from slipping and keeps your beads in place. You do not need knots at the ends.
Note: Use more backstitches in areas that will get pulled or stretched. This keeps your embroidery strong.
Running Stitch for Beads
The running stitch for beads is a quick way to sew beads onto fabric in a line. This method works well for long, straight lines or gentle curves.
How to do it:
- Draw a line where you want your beads.
- Bring the needle up at the start of the line.
- Pick up several beads (usually three to five).
- Lay the beads along the line.
- Push the needle down at the end of the last bead.
- Bring the needle up a short distance ahead on the line.
- Pick up more beads and repeat.
This stitch is faster than the backstitch, but it is not as strong. If you want your bead lines to last, use the running stitch in areas that will not get much wear. You can always mix running stitch and backstitch in one project.
Tip: Use a ruler or straight edge to draw your guide lines. This keeps your bead lines neat.
Couching Beads
Couching beads is a special technique that lets you sew beads onto fabric in any shape, even curves and swirls. You lay a string of beads on the surface and tack it down with small stitches.
How to do it:
- Thread your beading needle and string several beads onto the thread.
- Lay the string of beads on your fabric in the shape you want.
- With a second needle and thread, make tiny stitches over the thread between every two or three beads. Go down into the fabric and come up again to catch the bead string.
- Keep couching the beads until the whole string is attached.
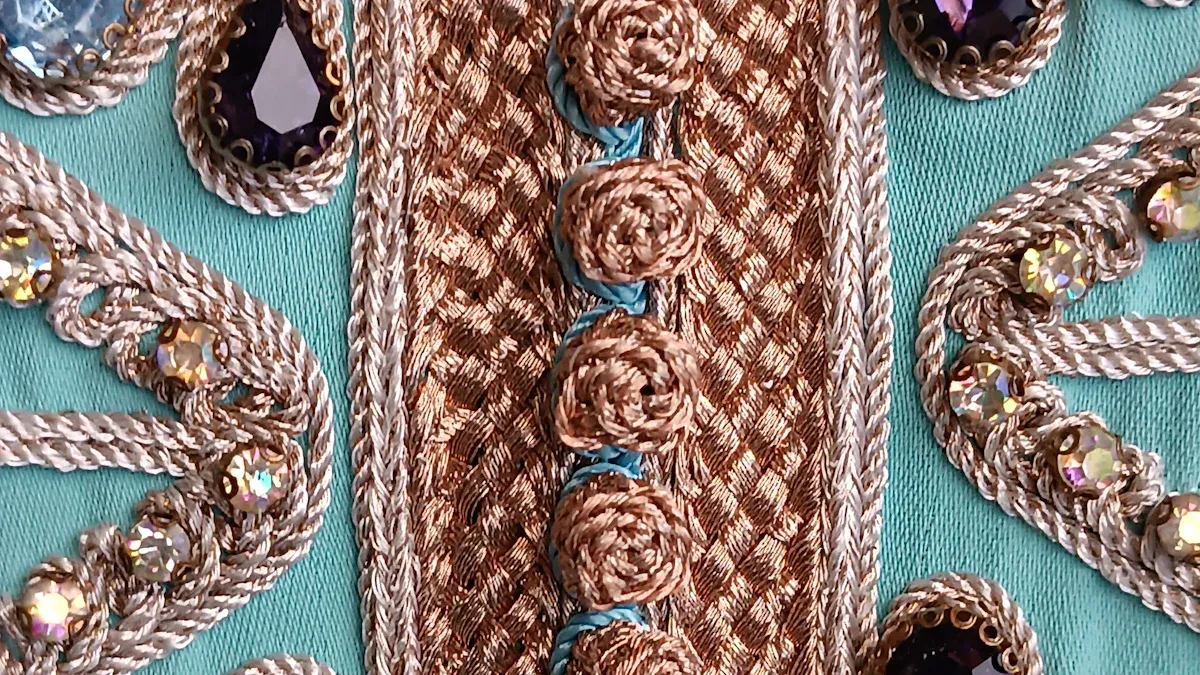
Couching is a favorite in hand embroidery because it gives you flexibility. You can create bold outlines, spirals, or even letters. This method also makes your beadwork last longer. In history, people used couching to attach delicate threads and beads. They found that couching, especially with braided or woven cords, made the embroidery stronger and helped it survive for many years.
Note: Couching works well for heavy beads or when you want to make shapes that are hard to sew with other stitches.
You can use these techniques alone or together. Try different embroidery stitches to see what works best for your design. If you want to learn more, look for a bead embroidery tutorial or practice with a small project. You will soon find your favorite way to sew beads onto fabric.
Adding Beads to Embroidery Designs
You can take your embroidery to the next level by adding beads to embroidery designs. When you add beads, you create texture, sparkle, and a three-dimensional look. You can use classic embroidery stitches and simply sew beads onto fabric as you go. Planning your bead placement before you start helps you get the look you want. Try sketching your design or marking spots with a fabric pen. Tweezers make it easy to pick up small beads and place them exactly where you want.
Beaded French Knots
French knots already give your embroidery a raised, textured look. When you add beads to French knots, you get even more dimension and shine. To do this, bring your needle up through the fabric, thread a bead, then wrap the thread around the needle as you would for a regular French knot. Pull the needle through to secure the bead. This technique works well for flower centers, berries, or any spot where you want a little pop. You can use seed beads like Miyuki or Delica beads for smooth, even results.
Bead Clusters
Sometimes you want to sew beads in a cluster for a bold effect. You can add beads to embroidery by grouping several beads close together. Start by bringing your needle up, pick up a bead, and sew it down. Repeat this step, placing each bead right next to the last one. You can use different sizes or colors for extra interest. Clusters work great for embellishing floral designs or creating textured accents. This method lets you incorporate beads with classic embroidery stitches like detached chain or fly stitch for even more texture.
Lines and Borders
You can add beads to embroidery stitches that form lines and borders. Try sewing beads onto fabric along a running stitch or buttonhole stitch. For a neat border, pick up a bead, sew it down, and repeat along your outline. You can also use laced or whipped stitches and load beads before passing the needle under the stitches. Adjust the spacing to change the look. Adding beads to embroidery borders gives your project a polished finish and makes your design stand out. Don’t forget to use bead accents to highlight special areas.
Tip: Always check that your needle and thread fit through your beads before you start. This saves time and keeps your embroidery smooth.
Custom Embroidered Fabric by Suerte Textile
Why Choose Custom Embroidered Fabric
If you want your embroidery to stand out, Suerte Textile’s custom embroidered fabric is a great choice. Suerte Textile has been in the fashion business for more than 14 years. They offer many types of fabric, like soft cotton, linen, shiny polyester blends, and fancy silks. You can choose the color, pattern, and style that matches what you want.
- Custom embroidered fabric makes your designs look classic and fancy.
- The threadwork gives texture and makes a strong base for beads.
- Embroidery on these fabrics stays nice, even after you wear or wash it a lot.
- You can pick hand-stitched or digital embroidery, so your bead projects can be simple or very detailed.
You can count on Suerte Textile to help you make special pieces that last a long time.
Beading on Suerte Textile Fabrics
It is easy and fun to add beads to Suerte Textile’s embroidered fabric. The fabric is strong, so beads stay in place and your beadwork looks neat. You can use different embroidery techniques, like couching or backstitch, to sew beads and make cool patterns.
Tip: Mix beads of different sizes and colors for more sparkle. The strong embroidered fabric keeps your beads safe and secure.
You can use these fabrics for dresses, shirts, or even things for your home. Suerte Textile’s embroidery works with both simple and complicated bead designs. Your finished projects will look fancy and feel special.
Care Tips
To keep your beaded custom embroidered fabric looking good, follow these easy steps:
- Clean off dust and dirt every day, especially near the beads.
- Use strong, good-quality threads for embroidery and beads so they do not break.
- If you use a sewing machine, oil the moving parts often and sew at a medium speed to protect the embroidery and beads.
- After oiling your machine, test a small spot to make sure no oil gets on the fabric.
- Store your embroidered fabric flat or rolled up, not folded, so the beads do not get squished.
Note: Magnetic hoops, like MaggieFrame, help you hoop fabric faster and keep it tight, so your beads stay in place.
If you follow these tips, your bead embroidery will look nice and last for a long time.
Troubleshooting and Pro Tips
Preventing Loose Beads
Loose beads and sequins can make your embroidery look messy. You want your stitches to hold everything tight. Always keep your thread tension even when you sew beads onto fabric. If your stitches feel too loose, try pulling the thread a little tighter before you finish each bead or sequin. Test your tension on a scrap piece of fabric before you start your main project. This helps you see if your stitches will hold beads and sequins in place. Clean your needle and thread often. Dust or lint can make it hard to secure sequins and beads. If you use a machine, check the tension disks and bobbin case for dirt. This keeps your stitches strong and your embroidery neat.
Tip: Wax your thread before you add beads or sequins. This helps the thread glide smoothly and keeps your stitches tight.
Fixing Mistakes
Everyone makes mistakes when they sew beads onto fabric. Maybe you pick up the wrong bead or your stitches tangle. If you split your thread, stop and take out the stitches back to the split. Trim the thread and start fresh. If you use the wrong color or size bead, gently remove it with your needle and replace it. Some people like to leave one odd bead as a “Spirit Bead” to show that nothing is perfect. If you get a knot, use a needle or awl to loosen it. Never yank the thread, or you might make the knot tighter. If you need to break a bead, use pliers on the edge, not the center, to avoid cutting your thread. Always wear safety glasses when you do this.
Note: Take the needle off the thread before you rip out stitches. This keeps your embroidery safe from extra damage.
Ensuring Durability
You want your embroidery to last a long time. Strong stitches and good habits help you sew beads onto fabric that stays beautiful. Always use strong thread and keep your tension steady. Try to keep your stitches even when you add beads or sequins. If you change threads or fabrics, test your stitches first. Clean your tools and workspace often. This stops dirt from getting into your stitches or making your sequins dull. For big projects, digital tension controls can help keep your stitches perfect. These tools adjust tension in real time, so your embroidery stays strong and your beads and sequins stay put.
Here’s a quick table to help you remember:
| Problem | Quick Fix |
|---|---|
| Loose beads | Check tension, tighten stitches |
| Thread tangling | Wax thread, untangle gently |
| Bead mistakes | Remove and replace, use Spirit Bead |
| Broken beads | Break at edge, protect thread |
Keep your stitches neat and your beads and sequins will shine for years!
You now have the top tips for making your embroidery shine. Try these steps for your next fabric beading projects:
- Use a size 9 or 10 beading needle for easy threading.
- Grab beading tweezers for placing sequins and beads.
- Keep your fabric tight in an embroidery hoop.
- Add fewer than three sequins or beads at a time for neat stitches.
- Pull your thread tight so sequins and beads sit close to the fabric.
- Secure your stitches by tying knots at the end.
- Use fusible interfacing on thin fabric.
- Mark guidelines with a water-soluble pen.
- Pick strong thread like Nymo for lasting stitches.
Start small and mix up your stitches, sequins, and beads. Every project helps you learn. Share your embroidery with others and inspire new ideas!
FAQ
How do you keep beads from falling off your embroidery?
You should always use strong thread and secure each bead with a tight stitch. Double back through the bead if you want extra strength. Tie off your thread well at the end. This keeps your beads in place.
Can you wash beaded embroidered fabric?
Yes, you can wash it, but do it gently. Hand wash in cold water with mild soap. Lay the fabric flat to dry. Avoid wringing or twisting. This helps protect both the beads and the embroidery.
What is the best needle for sewing beads onto fabric?
A fine beading needle, like size 10 or 12, works best. It fits through small bead holes and slides easily through fabric. Make sure your needle matches the size of your beads for smooth stitching.
Do you need a hoop for bead embroidery?
A hoop helps keep your fabric tight and flat. This makes it easier to sew beads in straight lines or patterns. You can use a magnetic hoop or a regular embroidery hoop. Your beads will look neater with a hoop.
Can you add beads to any type of fabric?
You can add beads to most fabrics. Strong, tightly woven fabrics like cotton or linen work best. If you use stretchy or thin fabric, add a stabilizer. This keeps your stitches and beads secure.